Wednesday, March 30, 2016
Transmission Tear Down
Sunday, March 20, 2016
Update 3-20-16 Stripping Interior
Today I have removed seats, removed old carpet, found a nickle, and have begun to removed the stock factory sound deadner. The deadner had water located in between which made the job difficult. My mentor told me to use a heat gun and a scraper to take out the sound deadner. I will begin to put the DynaMat within a week.
Thursday, March 17, 2016
Update 3/17/16: Sound Deading Part 1
I will be sound deading the interior, as well as installing carpet in the upcoming weeks. I expect this to be installed very soon. The DynamMat will eliminate a lot of the excess road noise that becomes annoying after a while.
Wednesday, March 16, 2016
Update 3-16-16: Radiator
My current radiator seems to not work as efficient as it should. I recievd this radiator, a Champion 3 row all aluminum, to replace the current one with. The aluminum radiator is said to work over 100% more efficient than the stock copper radiator.
I will be installing this item very soon.
Monday, March 14, 2016
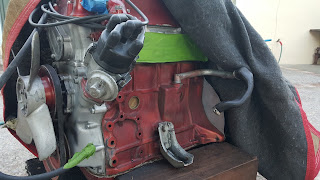
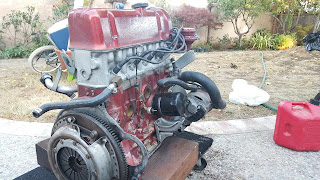
Engine: Degreasing/Cleaning Part I
Sunday, March 13, 2016
Engine: Degreasing/Cleaning
Wiring: Fuel Gauge
For reference, something that's helped a lot is this online wiring diagram that I found here. Although that wiring diagram is for a 1970+ Datsun 510 w/ manual transmission, it should be very similar to mine. Picture of wiring diagram below.
So far what I've done w/ the wiring is getting my fuel gauge to work! It was really important to get that to work since I want to know how much gasoline I had left. It was really easy to identify the problem after looking at the wiring diagram. On the diagram, there's a yellow cable that goes from the gas tank unit down towards a wiring harness where other cables are connected, then to the instrument cluster. The previous owner had wired the fuel gauge wire to the heater, and after a while it had melted and blew a fuse! There was no insulation between the fuel gauge wire, and other wires(see below).
I had then cut the yellow wire to a specific length and crimped new wire in between both ends.
After crimping the wires together, I had then reconnected the fuel gauge wire from the heater, to the other identical harness. Although they looked similar, they weren't. After turning the key to the ignition, nothing happened. I thought that the fuel gauge was broken. I actually found out that the car must be on for the fuel gauge to display. Now I have a working fuel gauge!


